
Practical Camping Guide · 13 min read
How to Choose Camping Cookware
Pick camping cookware by material, size and heat source, from titanium pots for backpackers to cast iron for campfires and sets for family car camping.

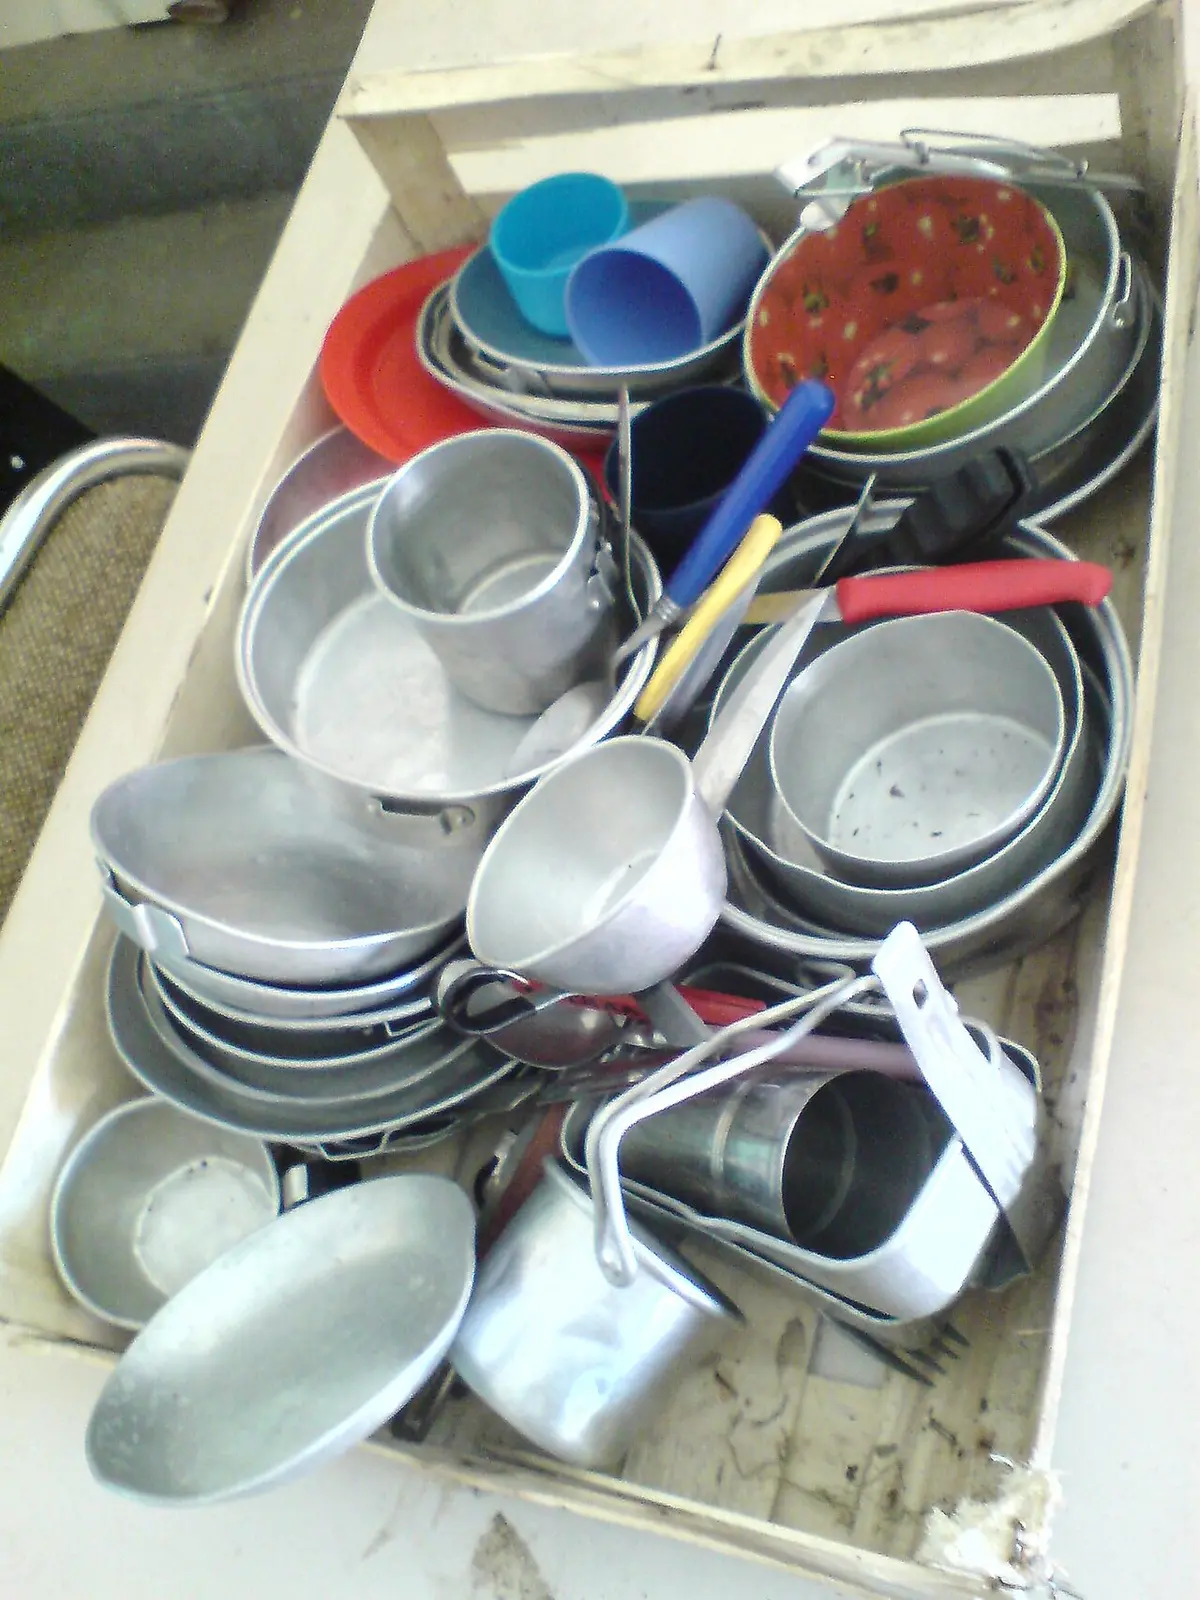
Choose camping cookware by matching three things: the material to how you cook (hard-anodized aluminum for all-round car camping, titanium for lightweight boiling, cast iron for open fire and searing, stainless for durability), the size to your group (about 1 liter of pot volume per person for backpacking, 3 to 5 liters for family cooking), and the base to your heat source (a flat, wide base for a stove, a ferromagnetic base for induction, a thick or lidded pot for fire). Nonstick coatings, nesting designs and a lid that fits are the features that matter after the first night.
Camp cookware is a case where more expensive does not automatically mean better. A basic aluminum set cooks well and nests small, while a titanium pot trims weight for hikers who count ounces but can scorch food if you try to fry in it. This guide explains how the materials behave, how to size a set for your group, how your heat source changes the choice, and what to look for in the details.
Start with how you cook
Before comparing materials, decide what you actually make at camp.
| Cooking style | What you need | Typical cookware |
|---|---|---|
| Boil water for freeze-dried or instant meals | One pot with a lid and a pour spout | 0.75 to 1.5 L pot, often titanium or aluminum |
| One-pot meals (pasta, rice, soups) | A pot with a lid that handles simmering | 1.5 to 3 L pot, aluminum or stainless |
| Breakfast on a stove (eggs, pancakes) | A pan with a nonstick surface | 8 to 10 inch skillet |
| Family cooking | A nested set of pots, a skillet, utensils | 3 to 5 piece set |
| Open fire cooking | Heavy cookware that tolerates flame and soot | Cast iron skillet or Dutch oven |
| Induction cooktop in an RV or at a powered site | A flat, magnetic base | Stainless or induction-compatible aluminum |
If most of your cooking is "add boiling water to a pouch," you do not need a skillet, and a 1 liter pot will do. If you cook breakfasts for four, you need a skillet and a large pot. The mismatch most people make is buying a large set and using one pot.
Materials compared
| Material | Weight | Heat conduction | Durability | Cost | Best for |
|---|---|---|---|---|---|
| Aluminum (plain) | Very light | Excellent, even | Dents, scratches, can pit with acidic food | Low | Backpacking, budget sets |
| Hard-anodized aluminum | Light | Excellent | Scratch-resistant, durable surface | Medium | Car camping and general use |
| Stainless steel | Medium to heavy | Fair, can scorch without a core | Very durable, easy to clean | Medium | Long-lasting kits, induction |
| Titanium | Lightest | Poor, hot spots | Very strong, does not corrode | High | Ultralight boiling |
| Cast iron | Very heavy | Slow to heat, holds heat well | Nearly indestructible with care | Low to medium | Open fire, searing, baking |
| Nonstick coated aluminum | Light | Excellent | Coating can scratch or wear | Low to medium | Eggs, pancakes |
| Enameled steel | Medium | Fair | Chips if dropped | Low | Mugs, plates, campfire cooking |
Aluminum
Aluminum is the workhorse of camp cookware. It conducts heat very well, which means it heats quickly and evenly, and it is light. Plain aluminum can react with acidic foods, such as tomato sauce, causing a metallic taste and pitting over time. Hard-anodized aluminum has been treated to create a hard oxide surface, which resists scratches and reactions and is easier to clean. For most car campers, a hard-anodized set strikes the best balance.
Stainless steel
Stainless steel resists rust, handles acidic food and takes abuse. Its weakness is that it conducts heat poorly, so thin stainless pots develop hot spots and scorch food. Better sets use a sandwich base with an aluminum or copper core to spread the heat. Stainless is a good choice for a set that you intend to keep for decades, and it works on induction cooktops.
Titanium
Titanium is the favorite of ultralight hikers. A titanium pot can weigh a third as much as a stainless one. The downside is poor conductivity, so a flame concentrates heat in the center and burns food on the bottom. Use titanium for boiling water and for meals you rehydrate, and avoid frying or cooking sticky foods. It is expensive, and it is the wrong tool for a family cooking breakfast.
Cast iron
Cast iron is the traditional open-fire cookware. It heats slowly but retains heat well, which gives an excellent sear and consistent baking temperature in a Dutch oven. It is heavy, and it needs care: dry it well, keep it seasoned with a thin layer of oil and avoid soaking. For car camping with a campfire, it is hard to beat for steaks and one-pot stews. For backpacking, it is out of the question. If you cook over open fire, see the best camping cookware for open fire.
Nonstick coatings
Nonstick surfaces make eggs and pancakes easy and cut cleanup, but coatings scratch if you use metal utensils or scrub hard. Use silicone or wooden tools, and do not overheat an empty pan. Replace a nonstick pan when the coating flakes. Many camp sets use a nonstick skillet with an aluminum body, which is practical for breakfast.
Sizing: how big should the pots be?
Pot volume depends on how many people you feed and what you make.
| Group and style | Pot volume | Skillet | Notes |
|---|---|---|---|
| Solo backpacker, boil and soak | 0.75 to 1.2 L | None | A single mug-pot is enough |
| Two backpackers, shared meals | 1.5 to 2 L | Optional 6 to 8 inch | One lid, one pot, two mugs |
| Couple, car camping | 2 to 3 L, plus 1 L | 8 to 10 inch | Pot for pasta, pan for eggs |
| Family of 4 | 3 to 4 L, plus 1.5 to 2 L | 10 to 12 inch | Cook pasta for four in one go |
| Group of 6 to 8 | 5 to 8 L, plus 3 L | 12 inch or griddle | Consider a second burner |
A pot that is too small makes you cook in batches, and one that is too big uses more fuel to heat. Another factor is the width of your stove's pot supports. A large, heavy pot on a tiny backpacking stove can tip, so check your stove's maximum recommended pot size. If you plan to use a lightweight stove with big pots, see the best backpacking stoves for large pots.
Match the cookware to your heat source
Cookware behaves differently over different flames.
Canister stove or camp stove. Any flat-bottomed pot works. A pot with a heat exchanger (fins on the base) boils water faster and uses less fuel, but only in a matched stove system. Wide pots on a narrow burner waste heat and are less stable. To understand how stove output interacts with pot size, see camp stove BTU ratings explained. For cold conditions, a lid and a small pot save fuel, as covered in how to use a canister stove in cold weather.
Open fire. Use cast iron or sturdy stainless or enameled steel. Aluminum can warp and melt in hot coals, and soot permanently blackens most surfaces. A pot with a bail handle hangs from a tripod, and a lid with a lip holds coals for baking. Rub a thin layer of dish soap on the outside of a pot to make soot easier to clean.
Induction cooktop. Induction needs a ferromagnetic base, such as stainless with a magnetic layer or cast iron. Plain aluminum and titanium do not work. If you camp at powered sites with an induction hob, see the best camping cookware for induction cooktops. Check the power available, since induction hobs can draw 1,200 to 1,800 W.
Camp grill grate. Cookware sits directly on the grate, so a flat, stable base helps. Cast iron skillets are a classic grill companion.
Features that matter more than you think
- A tight-fitting lid. A lid cuts boil time by 20 to 30 percent and saves fuel. A lid with a strainer holes makes draining pasta easy.
- Handles that fold or lock. Folding handles save space, but they must lock firmly when full. A pot that tips with boiling water in it is dangerous. Look for handles that stay cool or can be gripped with a pot lifter.
- Nesting design. A set that nests into itself, with mugs and a stove inside the pot, packs small and keeps rattles down.
- Pour spout and measuring marks. Interior volume marks help you measure water for meals.
- Flat, thick base. Thin bases warp and cook unevenly. A heavier base spreads heat better.
- Heat exchanger fins. Good for boiling only, and only with the matching stove.
- Dishwasher or easy-clean surface. Camp cleanup is limited, so a surface that wipes clean saves effort.
- Mug and bowl included. A set that includes serving pieces reduces what you must buy separately.
- No removable parts that disappear. Fewer small parts means fewer losses.
Materials safety and care
Use cookware as the maker intends. A few cautions apply to camp use.
- Do not heat an empty nonstick pan to high temperatures, and keep a nonstick pan away from open flame beyond the manufacturer's limit.
- Do not store acidic foods, such as tomato sauce, in plain aluminum for long.
- Season cast iron and dry it immediately, and re-season if rust appears.
- Check titanium and aluminum pots for cracks or corrosion, and do not use a pot with a split seam.
- Let cookware cool before dunking it in cold water, since sudden temperature changes can warp thin pots.
- Clean pots away from lakes and streams, using a small amount of biodegradable soap, and scatter strained dishwater well away from water sources, following local rules.
Budget tiers and what to expect
Price differences show up in the base thickness, coating quality and the little features such as locking handles. Entry-level sets can be perfectly serviceable for casual trips. Moving up gives you hard-anodized surfaces, better nonstick and tighter lids.
- Under $20. Basic aluminum or steel pots, often single pieces. See the best camping cookware under $20.
- Under $30. Small nesting sets with a couple of pots and utensils. See the best camping cookware under $30.
- Under $75. Larger sets with a skillet and better coatings, as in the best camping cookware under $75.
For a wider view, check the best camping cookware and the best camping cookware for families, which concentrate on larger group sets. For a full-service camp kitchen layout, consider how to set up a camp kitchen and how to cook while camping, which show how cookware fits into a routine.
Worked example: cooking dinner for four with one set
A family of four with a 4 liter pot, a 2 liter pot and a 10 inch skillet wants spaghetti with meat sauce and a side of corn. Walk through how the pieces share the work.
The 4 liter pot takes 3 liters of water for the pasta. Bringing that from 60 degrees F to a boil needs about 1,000 BTU of heat in the water, which on a 10,000 BTU/h burner at 40 percent efficiency means roughly 15 minutes with the lid on, and 20 or more with the lid off. The lid is the easiest saving in the kit. While the water heats, the skillet goes on the second burner and browns the meat over medium heat for 8 to 10 minutes, then the sauce joins it and simmers on low. A nonstick or hard-anodized skillet prevents the sauce from sticking, and a stainless one works if you keep the heat down. The 2 liter pot warms the corn in a small amount of water. The whole meal takes about 30 minutes and uses a few ounces of fuel.
Now imagine the same dinner in a single 1.5 liter titanium pot. You would boil water in batches, and each batch takes several minutes, and the sauce would scorch if you tried to simmer it over the same small flame. The meal takes an hour, the pasta goes cold and everyone gets grumpy. It is the same stove, the same food and the same cook, and the only difference is the pot. This is why the right size and material matter more than premium finishes.
Cleanup is the other half of the story. Pasta water can double as dishwater after cooling, which saves fuel and effort, and a nonstick skillet wipes out with a paper towel and a splash of water. Stainless pots may need a soak, and cast iron needs oil and a wipe, not soap. If you are cooking at a site with a water spigot nearby, the cleanup is easy, and at a remote site every extra scrubbing task counts. Think about the whole cycle, from heating to washing, when you choose a set.
Care and storage between trips
Cookware lasts for years with simple habits. Clean it fully after each trip, since food residue and moisture cause corrosion and smell. Dry aluminum and stainless before nesting them, and put a paper towel between nested pieces to prevent scratches and moisture traps. Store cast iron with a light coat of oil and a paper towel in the lid to absorb condensation. Check handle rivets and folding hinges for looseness, and tighten them if needed. Inspect nonstick coatings for scratches and flaking, and replace a pan that sheds its surface. Wash your cookware gently with a soft sponge, and avoid abrasive pads on anodized aluminum and nonstick surfaces. Keep the lid and the pot together so they do not get separated in the gear bin, and store the set in a mesh bag or a small crate so it is ready to load for the next trip.
A starter kit for common situations
The weekend couple. A 2 to 3 liter pot with a lid, a 1 liter pot, a nonstick skillet, a spatula, a ladle, a pot lifter, two mugs and two plates. Weight is not an issue, so choose hard-anodized aluminum or nonstick-coated aluminum.
The family of four. A 4 liter pot, a 2 liter pot, a 10 to 12 inch nonstick skillet, a griddle if you make pancakes, a colander or a lid with strainer holes, large spoons and a set of plates and cups. Hard-anodized or stainless sets are durable enough for kids.
The ultralight backpacker. One 0.9 liter titanium pot with a lid and a long-handled spoon. A single mug can double as a bowl. The only skill is boiling water.
The fire cook. A 12 inch cast iron skillet, a 4 to 6 quart Dutch oven, a lid lifter, heavy gloves and a grate. Add a wire brush and a small bottle of oil for seasoning.
The RV or van camper. Induction-compatible stainless cookware that nests, plus a small pressure cooker or a rice cooker if power allows.
Common mistakes to avoid
- Buying a big set and using two pieces. Match the set to what you really cook.
- Choosing titanium for a family. It is too slow and uneven for frying, and expensive.
- Taking cast iron backpacking. It is a car and campfire tool.
- Skipping the lid. It makes every pot faster and more efficient.
- Overlooking the stove's maximum pot size. An unstable pot is a danger.
- Using metal utensils on nonstick. The coating will not last.
- Forgetting a pot lifter. Hot handles and thin gloves lead to burns.
- Ignoring the heat source. Induction, fire and canister stoves each favor different bases.
Frequently asked questions
What is the best material for camping cookware?
It depends on the use. Hard-anodized aluminum is the best all-rounder for car camping, titanium is best for ultralight boiling, cast iron is best for open fire, and stainless steel is best for durability and induction cooktops. Many campers use two types for different jobs.
Can I use regular kitchen pots for camping?
Yes, if weight and space are not an issue. Household pots work on stoves, and they can be a cheap way to start. They are usually bulkier, and they lack nesting designs and folding handles, but they cook well. Avoid pots with plastic handles over open flame.
Is nonstick cookware safe for camping?
Modern nonstick coatings are considered safe at normal cooking temperatures, but they can be damaged by overheating, metal utensils and rough scrubbing. Use them on a stove, not directly in a fire, and replace pans whose coating is flaking.
How do I clean cookware at a campsite?
Scrape off food, wash in a basin with a little biodegradable soap and hot water, rinse and let it air dry. Do it at least 200 feet from streams and lakes, or follow local guidance, and strain food scraps into your trash. A sponge or soft scraper protects nonstick coatings.
Does my cookware work on an induction cooktop?
Only if the base is magnetic. Test with a refrigerator magnet: if it sticks firmly to the bottom of the pot, the pot will work on induction. Aluminum, titanium and many plain nonstick pans will not work unless they have a steel plate in the base.
How many pots do I need for a weekend trip?
Most couples and small families do well with two pots and a skillet. One pot handles pasta or rice, a second holds a sauce or beans, and the skillet takes care of breakfast. Fewer is fine if you plan simple meals.
Sources & further reading
- MSR: The ins and outs of canister fuels
- USDA FSIS: Safe minimum internal temperature chart
- REI: Snow Peak GigaPower 110 Gold fuel canister
Image credits
- "Gamelles en alu" by Medjaï, Public domain, via Wikimedia Commons.
- "Hobe Sound FL Jonathan Dickinson SP Trapper John artif01" by Ebyabe, CC BY-SA 3.0, via Wikimedia Commons.


Ready to buy?
Compare the gear: Camp Kitchen
6 Best Camping Cookware Under 75 in 2026
Best camping cookware under $75: six sets and pots compared on pot volume, piece count, stove inclusion and weight for family and car camping.
6 Best Camping Cookware in 2026
Camping cookware sets compared by piece count, pot size and nesting, for car campers and backpackers cooking for one to four people.
6 Best Camping Cookware For Family in 2026
Best camping cookware for families: six pot-and-pan sets for four to eight people, compared on pot volume, materials, tableware and how well they pack.
5 Best Camping Cookware For Induction Cooktop in 2026
Best camping cookware for induction cooktops: five induction-ready pots, pans and skillets for RV kitchens and portable burners, compared on base and handles.
6 Best Camping Cookware For Open Fire in 2026
Best camping cookware for open fire: six pot sets, grill-grate kits and a tripod compared on materials, handles, grates and how well they cope with flames.
3 Best Backpacking Stoves For Large Pots in 2026
Best backpacking stoves for large pots compared on listed pot support width, pot volume and stability, with an honest note on how few listings state it.
5 Best Camping Cookware Under 20 in 2026
Best camping cookware under $20: five budget pot-and-pan sets compared on piece count, material, capacity, weight and cleaning, from $16 to $20.
6 Best Camping Cookware Under 30 in 2026
Best camping cookware under $30: five mess kits and a titanium pot compared on piece count, pot size, material and weight, for solo, couple and family trips.
Keep reading