
Practical RV Guide · 12 min read
MPPT vs PWM Charge Controllers: How to Size One
Learn when to use MPPT or PWM charge controllers and how to size amps and input voltage, including cold-weather Voc, with worked RV solar examples.

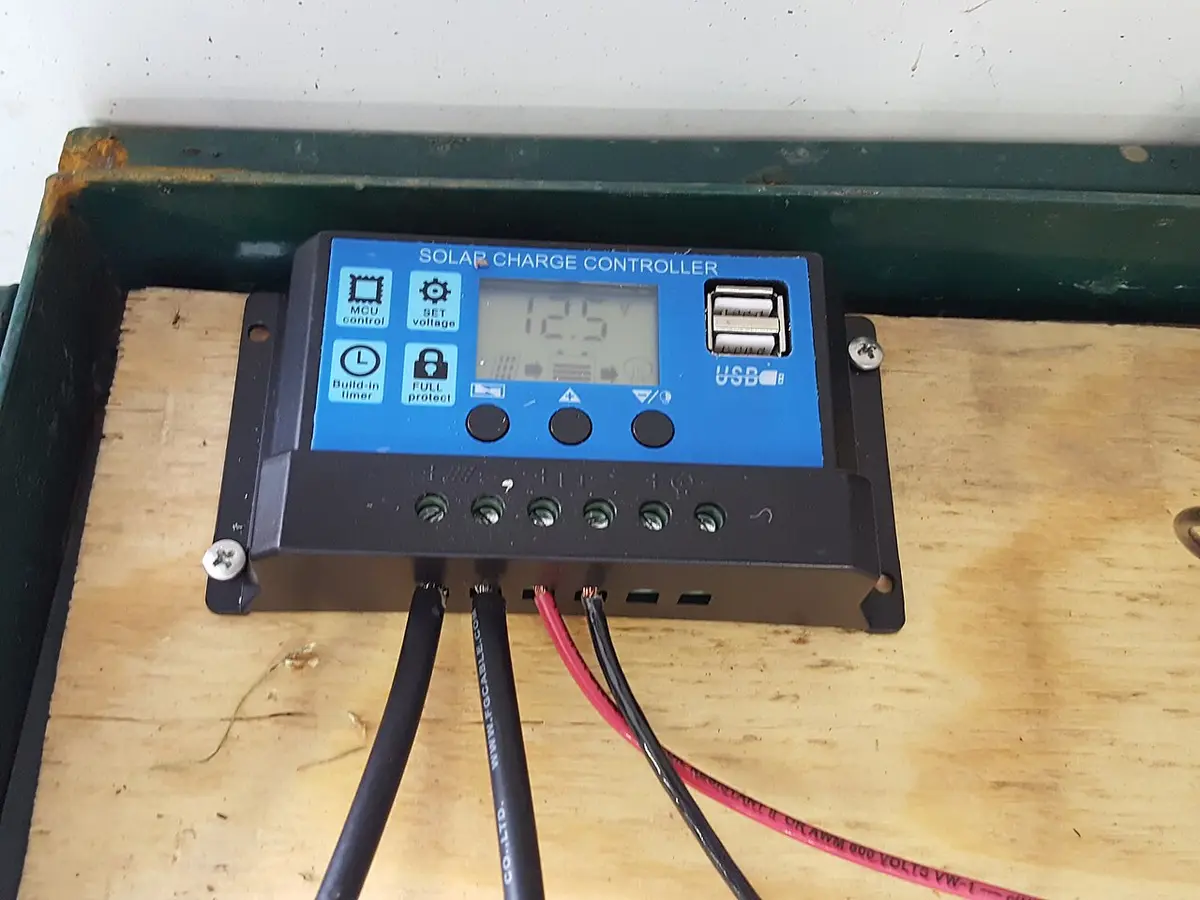
Use an MPPT controller for any array above roughly 200 W, any system where the panels are higher voltage than the battery, and any cold-climate setup; it harvests an estimated 15 to 30 percent more energy than PWM in typical conditions. Use a PWM controller only for a small 12 V system with panels matched to the battery voltage, where its lower price is the point. To size either type, work out two limits: the charging current (array watts divided by battery voltage, plus a 25 percent margin) and, for MPPT, the maximum input voltage (the panels' open-circuit voltage corrected for the coldest temperature you will see).
Sizing is where most RV and camper solar mistakes happen, and the mistakes are expensive: an undersized controller overheats and throttles, while an input-voltage overrun can destroy it the first frosty morning. This guide explains how each type works, walks through the arithmetic with real examples, and gives a checklist you can use on any controller's spec sheet.
What a charge controller does
A solar panel produces variable voltage and current depending on sunlight and temperature. A battery wants a controlled voltage that changes through the charge cycle: a bulk stage at a higher current, an absorption stage at a steady voltage near 14.4 V for a typical 12 V lead-acid or lithium system, and a float stage at a lower voltage. A charge controller sits between them and does three jobs: it limits current so the battery is not overcharged, it follows the right charge profile for the battery type, and it prevents the battery from discharging backward into the panels at night.
The two common designs differ in how they bridge the gap between panel voltage and battery voltage.
How PWM works
A pulse width modulation (PWM) controller is essentially a smart switch. It connects the panel directly to the battery and rapidly switches on and off to regulate the charge. Because the panel is connected directly, its voltage is pulled down to the battery's voltage. A 12 V nominal panel typically has a maximum power voltage (Vmp) of about 17 to 18 V and a rated current at that voltage. When connected to a battery at about 13 V, the panel operates at that lower voltage, and since power is voltage times current, it delivers less than its rated power, because the current stays about the same while the voltage falls.
That makes PWM simple, cheap and reliable, but inefficient when panel voltage is higher than battery voltage. The loss is a fixed cost of the design. On a hot day, when panel voltage naturally falls, the penalty is smaller, which is why PWM can look acceptable in summer and poor in cool weather.
How MPPT works
A maximum power point tracking (MPPT) controller is a DC-to-DC converter with a tracking algorithm. It continually adjusts the panel's operating voltage to the point where voltage times current is highest, then converts that power down to the battery voltage, raising the current. It takes high-voltage, low-current power and converts it into lower-voltage, higher-current power at close to the same wattage, less 2 to 5 percent of conversion loss.
Two consequences follow. First, you can wire panels in series to higher voltage, which allows thinner wire and less loss over long runs. Second, the controller can charge a 12 V battery from a 36 V or 100 V array. The trade-off is cost and complexity, but the added energy typically pays for the difference on any array bigger than about 200 W.
Efficiency: how much more does MPPT harvest?
Published estimates of MPPT's advantage vary, with sources citing roughly 15 to 30 percent in typical conditions and higher figures in cold weather or with a deeply discharged battery. The gain is largest when:
- It is cold. Panel voltage rises as temperature falls, so the mismatch with the battery grows.
- The battery is low. A discharged battery sits at a lower voltage, so the panel is pulled further from its maximum power point under PWM.
- The array voltage is higher than the battery. Series-wired panels and 24 V or 36 V panels benefit most.
- Light is weak or partly cloudy. MPPT tracks changing conditions and extracts more from dim light.
The gain is smallest in hot summer weather with a nearly full battery and a nominal 12 V panel, where PWM loses relatively little. Treat the percentages as ballpark figures, and remember that real results depend on panel, wiring and temperature.
| Situation | PWM efficiency vs panel rating (illustrative) | MPPT efficiency (illustrative) | Practical gain |
|---|---|---|---|
| Hot day, battery nearly full, 12 V panel | 75 to 80 percent | 92 to 96 percent | 15 to 20 percent |
| Cool day, battery half full, 12 V panel | 70 to 75 percent | 94 to 97 percent | 25 to 35 percent |
| Cold clear day, low battery | 65 to 72 percent | 95 to 98 percent | 30 to 40 percent |
| 24 V panels on a 12 V battery | Not recommended | 94 to 97 percent | Large |
Sizing step 1: charging current
The controller's current rating (in amps) must exceed the current it will carry into the battery. The common rule is to divide the array's total wattage by the battery voltage and add a safety margin of 25 percent to cover brief peaks of sunlight above the panel rating.
Formula: Controller amps = (Array watts / Battery voltage) x 1.25
| Array watts | 12 V battery: amps with margin | 24 V battery: amps with margin | Suggested controller |
|---|---|---|---|
| 100 W | 10.4 A | 5.2 A | 15 A (12 V) |
| 200 W | 20.8 A | 10.4 A | 30 A (12 V) |
| 300 W | 31.3 A | 15.6 A | 40 A (12 V) |
| 400 W | 41.7 A | 20.8 A | 50 A (12 V) |
| 600 W | 62.5 A | 31.3 A | 70 to 80 A (12 V) |
| 800 W | 83.3 A | 41.7 A | 100 A (12 V) |
| 1,000 W | 104 A | 52 A | 100 A (24 V), or two controllers |
A higher-voltage battery bank halves the current for the same power, so a 24 V system needs a smaller controller for the same array. That is one reason larger systems move to 24 V or 48 V. If you want to explore the sizing method in more depth with camper-specific examples, see the guide on how to size an RV solar charge controller.
For high-output arrays, see the best 80 amp budget MPPT controllers and the best 100 amp solar charge controllers. Smaller systems fit the best 10 amp solar charge controllers.
Sizing step 2: input voltage and the cold-weather trap
An MPPT controller lists a maximum input voltage, often 100 V, 150 V or higher. If the array's open-circuit voltage (Voc) exceeds this limit, the controller can be damaged or destroyed. Voc is the highest voltage the array produces, and it rises as temperature drops.
Why cold matters. A panel's Voc increases about 0.25 to 0.35 percent for each degree C below the 25 degree C test condition, according to the temperature coefficient on its datasheet. On a frosty morning at minus 10 degrees C, the correction is about 35 degrees times 0.3 percent, or roughly 10 to 12 percent above rated Voc. Some guidance suggests a rough factor of 1.25 for temperate U.S. climates and as much as 1.4 in extreme cold, but the datasheet calculation is more reliable.
Method:
- Find the panel's Voc and its temperature coefficient of Voc from the datasheet.
- Decide the coldest temperature your array will see, such as the record low for your region.
- Calculate cold Voc = Voc x (1 + coefficient x (cold temp minus 25 degrees C)), where the coefficient is negative so the result rises.
- Multiply by the number of panels in series.
- The result must be below the controller's maximum input voltage, ideally with 10 percent margin.
Example. Three panels with Voc 22.5 V each, coefficient minus 0.3 percent per degree C, wired in series. Coldest temperature expected: minus 10 degrees C. Cold Voc per panel is 22.5 x (1 + 0.003 x 35) = 22.5 x 1.105 = 24.9 V. Three in series gives 74.6 V. A controller rated 100 V handles it with margin. A controller rated 75 V does not.
Also check that the array's voltage at the maximum power point (Vmp) stays above the battery voltage plus a few volts, typically at least 5 to 8 V above, so the controller can charge. On a hot day, Vmp falls, and an array of too few panels in series may not reach it.
Series versus parallel wiring
How you wire panels changes the voltage and current into the controller.
| Wiring | Voltage | Current | Best with |
|---|---|---|---|
| Parallel | Same as one panel | Adds | PWM, short runs, shade tolerance |
| Series | Adds | Same as one panel | MPPT, long wire runs, thinner wire |
| Series-parallel | Mixed | Mixed | Larger MPPT arrays |
PWM systems typically wire 12 V panels in parallel, since the controller needs panel voltage close to the battery voltage. MPPT lets you wire panels in series to use higher voltage and lower current, which reduces wire loss and cost. Series wiring is more sensitive to shade: one shaded panel in a series string can drag down the whole string, so consider placement. For a van or RV roof with partial shade from vents and air conditioners, parallel or split strings can perform better.
PWM sizing details
PWM sizing is simpler but has rules of its own:
- The panel's nominal voltage should match the battery: 12 V panels (36 cells) for a 12 V battery, 24 V panels for a 24 V battery.
- The controller's current rating must exceed the array's short-circuit current (Isc) times 1.25, and PWM controllers are rated by the current they pass, which is equal to the panel current.
- Because PWM output current equals the panel's current, you do not gain current at the battery. A 100 W panel with 5.5 A Isc delivers about 5.5 A to the battery, even though the battery is at a lower voltage.
- Keep arrays small. Above about 200 to 300 W, the cost of lost energy and a larger controller usually exceeds the savings.
Compare approaches in PWM versus MPPT for RV solar, which looks at the decision from the camper's point of view. For 12 V and 24 V systems, the best 12 volt solar charge controllers and the best 12 volt and 24 volt solar charge controllers cover typical combinations.
Battery type settings
A good controller allows you to choose the charge profile for your battery. Lead-acid (flooded, AGM or gel) and LiFePO4 have different target voltages and temperature compensation. Using the wrong profile undercharges or overcharges the battery. For LiFePO4, check that the controller has a lithium setting or an adjustable profile with no long float stage, and look for low-temperature charge cutoff to protect lithium batteries in freezing weather. Our understanding of battery condition is covered in how to read RV battery state of charge, which complements this guide.
Features worth paying for
- Bluetooth or app monitoring. See voltage, current and daily harvest on a phone. A budget solar charge controller with Bluetooth provides this at low cost.
- A temperature sensor. Lets the controller adjust charge voltage for battery temperature.
- AC input or shore charging. Some controllers or combos accept an AC charging source, as in a budget solar charge controller with AC input. See also how to charge RV batteries from shore power for how the other charge sources fit together.
- Load output. Useful for a small 12 V light circuit, but check the amp rating.
- Programmable settings. Needed for custom battery profiles.
- Reverse polarity and over-temperature protection. Basic, but not universal in the cheapest units.
- Large heat sink. Controllers throttle when hot, so airflow and mounting location matter.
- High-amp budget options. The best budget 80 amp solar charge controllers show what larger capacity costs without MPPT premium features.
Installation basics that affect sizing
Sizing and installation interact. A few rules keep the controller within its limits:
- Fuse or breaker on both sides. Protect the wire between the panels and the controller, and between the controller and battery, with fuses sized to the wire and the controller rating.
- Wire gauge for current. Size wire for the maximum current with less than 2 to 3 percent voltage drop.
- Connect the battery first, then the panels. Many controllers need to see the battery voltage to detect the system voltage before the panels are attached. Disconnect in reverse order.
- Mount near the battery. Short battery cables reduce loss and allow the temperature sensor to read the battery.
- Ventilate. Do not bury the controller in an enclosed cabinet without airflow.
- Plan for expansion. If you may add panels later, choose a controller with room above your current array.
A full worked example: a 400 W array on a 12 V RV battery bank
You have four 100 W panels with Voc 22.4 V, Vmp 18.5 V, Isc 5.8 A, and a Voc temperature coefficient of minus 0.3 percent per degree C. The battery bank is 12 V LiFePO4. The coldest night you expect is minus 5 degrees C.
Option A, MPPT with series wiring (2s2p). Two panels in series make 44.8 V Voc, and two such strings in parallel. Cold Voc per panel: 22.4 x (1 + 0.003 x 30) = 24.4 V, so 48.8 V per series pair. Array current: 2 x 5.8 A = 11.6 A. Charge current: 400 W / 12 V x 1.25 = 41.7 A, so a 50 A controller with a 100 V input limit works. At Vmp the pair operates near 37 V, well above battery voltage, so tracking is easy.
Option B, PWM with parallel wiring. Four panels in parallel at 12 V give 23.2 A Isc. PWM controller must handle at least 29 A, so a 30 A PWM unit is a minimum and 40 A is safer. But under PWM, the panels operate near battery voltage and deliver roughly 75 percent of their rated output, so a 400 W array yields around 300 W at best, and less in cold weather.
The MPPT controller costs more upfront, though it harvests roughly 15 to 30 percent more energy, which is like adding one extra 100 W panel for free. For the same energy with PWM, you would need a fifth panel, more roof space and more wire. That is why most RV solar installers now default to MPPT.
Common mistakes to avoid
- Ignoring cold Voc. A string that is safe in summer can exceed the input limit on a frosty morning.
- Sizing by panel watts alone. Use current at the battery voltage, with margin.
- Using PWM on a large array. The lost energy outweighs the savings.
- Mixing panel types in series. Different currents limit the string to the weakest panel.
- Skipping fuses. A short on a battery bank can be catastrophic.
- Choosing the wrong battery profile. It shortens battery life.
- Undersized wire. Voltage drop eats the gains you paid for.
- Mounting in a hot closet. Controllers derate when overheated.
Frequently asked questions
Can I use a PWM controller with a 24 V panel on a 12 V battery?
Not efficiently. A 24 V panel on a 12 V battery through PWM wastes about half of the panel's potential. MPPT is designed to convert that higher voltage into extra charging current, so use MPPT for mismatched voltages.
How many amps do I need for 400 watts of solar?
Divide 400 W by the battery voltage and add 25 percent. At 12 V, that is about 42 A, so a 50 A controller is the usual choice. At 24 V, it is about 21 A, so a 30 A controller works.
Can I connect more panels than the controller is rated for?
Some controllers tolerate oversizing the array and simply clip the extra power, but only within the stated maximum input voltage and short-circuit current. Exceeding voltage can destroy the unit. Check the datasheet, and do not exceed voltage under any circumstance.
Is MPPT worth it for a single 100 W panel?
Often not. A small PWM controller is cheaper, and the energy gain is small in absolute terms. If you plan to expand later or live in a cold climate, MPPT may be worth it from the start.
What happens if my array voltage is too low for an MPPT controller?
The controller needs panel voltage above the battery voltage by some margin to charge. If a hot day pulls Vmp too close to the battery voltage, charging slows or stops. Wiring more panels in series or choosing a lower start-up voltage controller fixes it.
Do I need a different controller for lithium batteries?
You need a controller that offers a lithium profile or custom settings. Lead-acid profiles can undercharge or overcharge LiFePO4, and some include a float stage that is unnecessary for lithium. Check for low-temperature charge protection too.
Sources & further reading
- TheGreenWatt: Solar charge controller size calculator
- PES Supply: Solar charge controller sizing selector
- Renogy: Solar charge controller sizing and how to choose one
Image credits
- "Kabus 000245 171295 516064 4578 (36775931446)" by Photo by Cody Kabus., U.S. Department of Energy from United States, Public domain, via Wikimedia Commons.
- "SUOER SOLAR CHARGE CONTROLLER" by Ranjithkumar Murugesan, CC0, via Wikimedia Commons.


Ready to buy?
Compare the gear: Power & Electrical
6 Best Budget 80 Amp MPPT Solar Charge Controllers in 2026
Six budget 80 amp MPPT solar charge controllers judged on what a real tracking unit publishes: PV voltage ceiling, working window and efficiency figures.
5 Best Budget 80 Amp Solar Charge Controllers in 2026
Five budget 80 amp solar charge controllers sized as a whole-system decision: bank voltage, cable, PV input limits, paralleling and MPPT versus PWM.
6 Best Budget Solar Charge Controllers With AC Input in 2026
Six budget solar controllers with AC input, all built into hybrid inverter chargers: solar amps, AC charge amps, bank voltage and priority modes compared.
6 Best Budget Solar Charge Controllers With Bluetooth in 2026
Six budget solar charge controllers with Bluetooth for RVs, vans and camp rigs, compared on charge amps, panel limits, lithium support and load modes.
6 Best 10 Amp Solar Charge Controller in 2026
Six 10A solar charge controllers for one or two small panels, compared on PWM versus MPPT, 12V versus 12V/24V and USB charging, for RVs, vans and boats.
6 Best 100 Amp Solar Charge Controller in 2026
Six 100A solar charge controllers for large 12V to 48V arrays, with sizing for 1200W at 12V, 4800W at 48V, and a PWM versus MPPT reality check.
6 Best 12 Volt 24 Volt Solar Charge Controller in 2026
Six solar charge controllers that auto-detect 12V and 24V banks, from small PWM units to a 120A MPPT, for owners who may change battery voltage later.
5 Best 12 Volt Solar Charge Controller in 2026
Five solar charge controllers for 12V RV and camper batteries, with amp sizing math (watts divided by 12) and notes on PWM, MPPT and lead-acid-only units.
Keep reading