
Practical Camping Guide · 13 min read
How Hiking Boots Should Fit
How to measure your feet and test hiking boot fit: toe room, heel lift, width, a ramp test, lacing fixes and fit versus break-in discomfort.

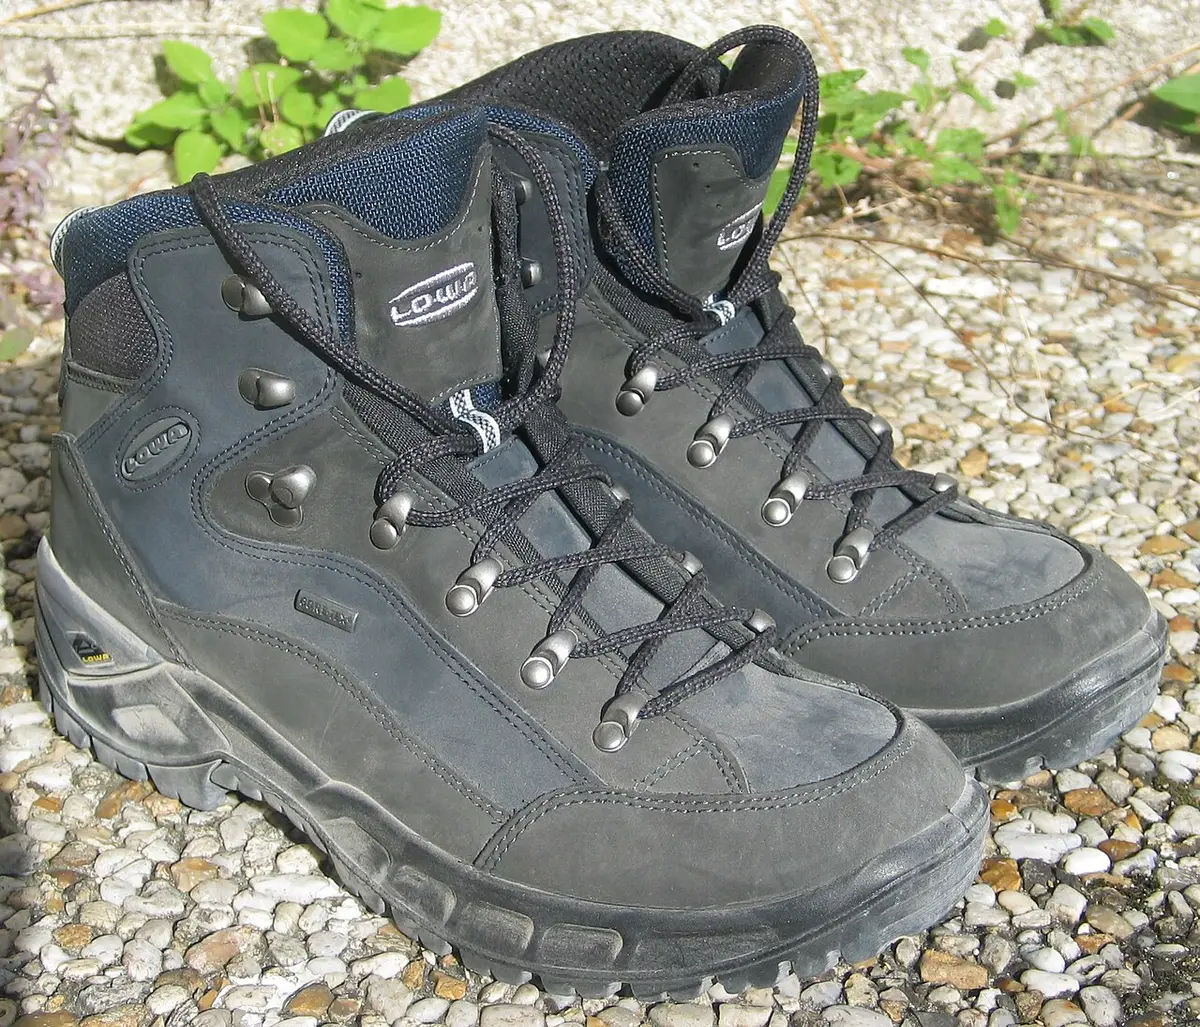
A hiking boot should fit with about a thumb's width (roughly half an inch) of space in front of your longest toe, a snug heel that lifts no more than about a quarter inch when you walk, enough width that your toes can spread without pressing the sides and no pressure points across the instep or ankle. Try boots on in the afternoon, wearing the socks you will hike in, and test them on a ramp or incline to see whether your toes hit the front on a descent.
A boot that fits well on the store floor can still blister you on a long descent. Feet swell during the day and on the trail by half a size, the heel may slide only when you climb and the toe box may be fine until you walk downhill. This guide covers how to measure your feet, how each part of the boot should feel, how to test fit on a slope, how to adjust with lacing and insoles, the differences between men's, women's and kids' lasts, and how to tell fit problems from break-in discomfort.
Measure your foot properly
Start with an accurate measurement. Stand on a sheet of paper with your weight evenly distributed, trace your foot or mark the longest toe and the heel, and measure the length between them. Measure the width across the ball of the foot, the widest point. Do this in the late afternoon, when your feet are at their largest, and measure both feet, since most people have one foot larger than the other. Fit to the larger foot.
Brannock devices in shoe stores measure length, heel-to-ball length and width. Heel-to-ball matters because a boot flexes at the ball, and if the flex point of the boot does not match the flex point of your foot, you get heel slip or toe jamming even when the overall length is right. Sizes also vary across brands and between boots and shoes, so treat the size on the box as a starting point, not a promise.
Length: room for the toes
Standing with the boot laced, slide your foot forward until your toes touch the front, and check the gap behind your heel with a finger. You should be able to fit one finger behind the heel, which gives you about half an inch to three-quarters of an inch of space in front when you slide your foot back. When you walk downhill, your foot slides forward, and that space is what saves your toenails. A boot that is too short causes black toenails and bruised toes, and one that is too long lets the foot slide and rub.
Many hikers need a half size to a full size larger than their street shoe, because feet expand on the trail and thick hiking socks take up room. Buy for your trail foot, not your office foot.
Width and volume
Width means how much room is across the ball and toes. Your toes should be able to splay naturally without touching the sides. Pressure on the little toe or the ball of the foot means the boot is too narrow, and sliding side to side means it is too wide. Many brands offer wide sizes or different lasts for narrow, regular and wide feet.
Volume is the total space inside the boot, including the height at the instep. A high-volume foot needs a roomier boot, and a low-volume foot needs less. Signs of too much volume: a loose feel even when tightly laced, heel lift and wrinkled leather at the sides. Signs of too little: numb toes, tingling or pressure across the top of the foot. Adjust with thicker or thinner socks and aftermarket insoles, but start with a boot that matches your volume.
Heel: the lock
The heel should feel locked in without pressure. A well-fitting boot allows no more than about a quarter inch of heel lift when you walk up a slope. Excess lift causes friction that leads to blisters, and a heel that is too tight can cause bruising and pressure on the Achilles tendon. Use the lacing technique below to lock the heel if it slips, and check that the heel cup shape matches your foot.
Test heel fit by walking up an incline, standing on your toes and bouncing slightly. If you feel the heel rising more than a pencil's width, try a different size or model, or adjust lacing and insoles.
Ankle and instep
The ankle collar should be snug but not tight, with padding that sits comfortably without pinching. Tall boots provide ankle support and protect against debris and rocks, while low boots and shoes give more freedom. The instep, the top of the foot, should not feel squeezed by the laces. Pressure here is a sign that the boot is too low in volume or that the lacing is too tight. Numbness in the toes after a while is a warning.
Check that the tongue stays centered and that the padding does not bunch. If it slides to the side, the boot may be too wide or the tongue too thin. A gusseted tongue, attached to the sides, keeps debris out and stays in place.
Test the fit on a slope
Most boot stores have an inclined ramp, and for good reason. Walk up and down the ramp several times, wearing the boots laced and wearing your usual socks.
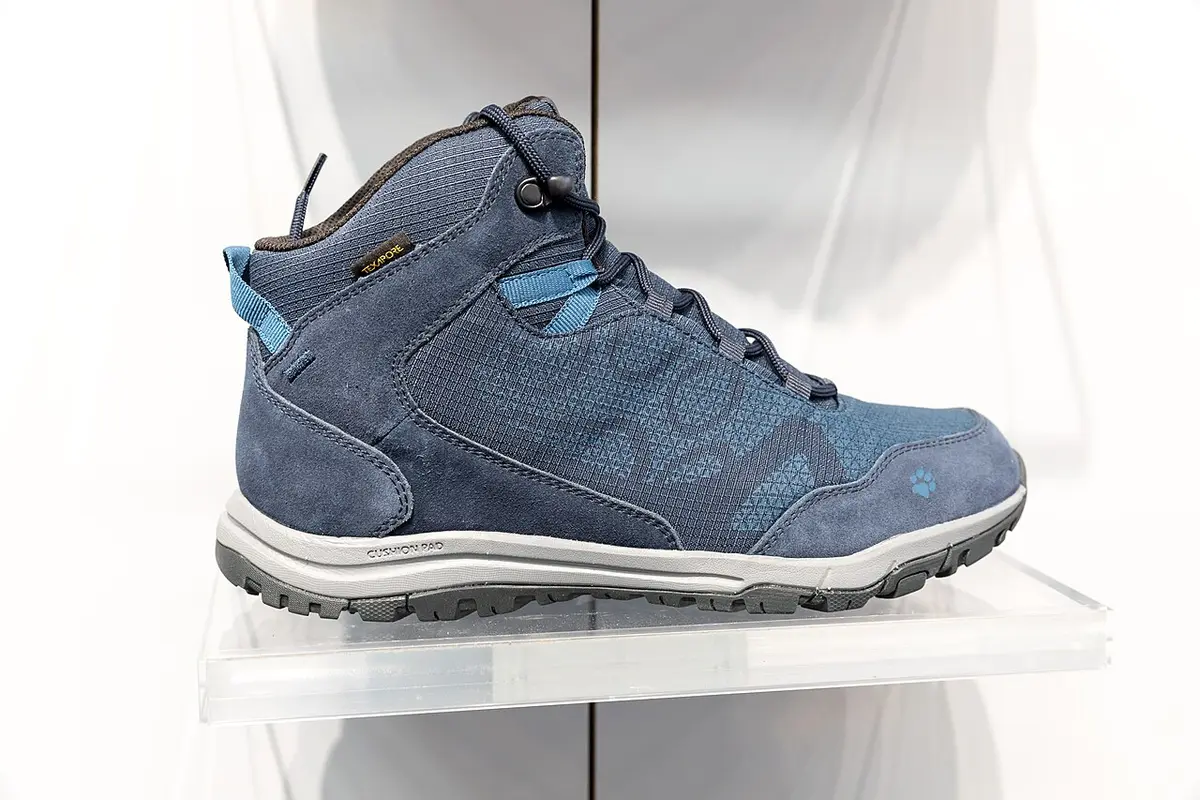
- Uphill: The heel should stay down, with little lift.
- Downhill: Your toes should not touch the front. If they do, the boot is too small or needs a different lacing.
- Sidehill: The foot should not slide sideways, and you should feel stable.
- Flexing: The boot should flex at the same place as your foot, near the ball.
If no ramp is available, find stairs or a slope at home and test the boots there, walking in your living room with a loaded pack for 15 to 20 minutes. Many retailers allow returns on unworn boots, which helps if you buy online.
Socks, insoles and lacing
Fit changes with socks. Try boots with the socks you will hike in, usually a medium-weight merino or synthetic hiking sock. A thicker sock takes up room, and a thin one leaves slop. Avoid cotton, which holds moisture and causes blisters.
Insoles, the removable footbeds that come in a boot, are often thin foam. Aftermarket insoles can improve arch support and fit, but they also take up volume. Test them in the boot and re-check fit. A properly fitting insole helps with plantar fasciitis and other foot conditions; see the guidance in hiking boots vs hiking shoes vs trail runners.
Lacing is a free fit adjustment. Skip a lace eyelet to relieve pressure on the instep. Use a surgeon's knot, a double twist, to lock the heel in place at the ankle. Use a heel-lock or runner's loop, threading the lace through the top eyelets to cinch the ankle. For a narrow heel and wide forefoot, lace the lower and upper parts of the boot separately, with a looser lower section and a tighter upper section.
Men's, women's and kids' lasts
A last is the form around which a boot is built. Women's lasts are generally narrower in the heel and wider in the forefoot compared with men's lasts, and sized differently. A man with a narrow foot may fit a women's boot, and vice versa, so try both if the fit is off. Kids' feet change quickly and need room to grow, but too much room invites blisters. Fit kids' boots with a thumb's width in front, and re-check every few months.
For budget options, our shop lists include the best hiking boots under $50, under $75, the best hiking shoes under $50 and under $75. For men's options, see the best hiking boots for men under $100 and waterproof options. Fit matters more than price, and a well-fitted budget boot beats a poorly fitted premium one.
Waterproof boots and fit
Waterproof liners add a little bulk and make the boot stiffer. They may change how the boot feels at the ankle and the toe, so try waterproof and non-waterproof versions if you can. For the trade-offs, see waterproof vs non-waterproof hiking footwear. If your feet sweat a lot or the weather is hot, a non-waterproof boot may fit more comfortably because it breathes better.
In winter, boots need room for thicker socks and sometimes extra insulation, so try them with your winter socks. See winter boot temperature ratings explained for how cold-weather boots differ.
Fit by foot shape and special conditions
Not every foot fits the standard mold, and a few common foot types change the fitting advice. Wide feet need a boot with a wide toe box and often a wide last, not just a bigger size, because a longer boot adds length without adding width and increases heel slip. Look for brands that offer wide widths, and try women's or men's models, since forefoot width differs. Narrow feet and low volume do better in boots with a narrow last and lacing that cinches the midfoot, and they may need a thicker sock or a volume insole to fill space. High arches may feel pressure on the instep and need a boot with a higher instep or a softer tongue. Flat feet need arch support and a stable midsole to control rolling.
Plantar fasciitis and heel pain benefit from boots with firm arch support, a cushioned heel and a rocker-style sole, and an over-the-counter or custom insole. Make sure the boot has enough room for the insole. Bunions and hammertoes need a roomy toe box and a soft, stretchable upper that does not press on the joint. Swollen feet from heat or long days need extra room and breathable materials. If you have a medical condition such as diabetes, neuropathy or circulation problems, consult a podiatrist about footwear.
Orthotics add another variable. If you use custom orthotics, bring them to the store and test the boots with them, since they displace volume. A boot that fits with the stock insole may feel tight with an orthotic, and the reverse is true for loose boots that need a thicker footbed. Ask whether the boot has a removable insole, and remove it before inserting yours.
A fitting checklist for the store or at home
Run through this sequence before you decide, and do it with a loaded pack if you can.
- Wear your hiking socks and any orthotics.
- Remove the insole and stand on it to check that your foot fits within its outline.
- Put the boot on, kick the heel back against a hard surface and lace it from the bottom up, snugly.
- Stand and check the toe room with a thumb.
- Walk around for at least ten minutes, on a ramp if possible.
- Test the descent for toe contact, and the ascent for heel lift.
- Roll to the sides to test stability and check for pressure points.
- Compare both feet, and try a half size up and down.
- Walk with a pack, because added weight spreads the foot and tests the fit.
- If buying online, order two sizes and return the one that does not fit.
A good fit often feels right in the first few minutes, with no pain, no slipping and plenty of room for toes. Trust that feeling, and do not talk yourself into a boot that is almost right.
Fit problems versus break-in
New boots feel stiff, and some discomfort is normal, but certain sensations indicate poor fit and not break-in. Pain, numbness, sharp pressure points and toes hitting the front are fit problems that will not improve. Mild stiffness, creasing and a snug feel that eases after several short hikes are break-in. If a boot hurts in the store, it will hurt on the trail. If it feels almost right with a little stiffness, break it in gradually with short walks.
Look at how the boot behaves after a few outings. Hot spots, red marks and blisters appear in specific places, and they tell you what to fix: heel blisters suggest heel slip, toe blisters suggest a short toe box or downhill sliding and ball-of-foot blisters suggest narrowness or loose fit. Adjust lacing, socks or insoles, and return the boots if the problem persists.
When to re-check your fit
Fit is not a one-time decision. Feet change with age, weight, pregnancy, injury and training, and a boot that fit last year may not fit now. Re-measure your feet every year or two, especially before a big trip. Boots also change: midsoles compress, uppers stretch and insoles flatten, so a boot with a thousand miles on it fits differently from a new pair of the same size. If you notice new hot spots, heel lift that did not exist before or toe pressure, check the boots and the insoles before blaming your feet.
Before any long trip, wear the boots on at least two or three loaded training hikes of several miles. Trim your toenails short, carry a few strips of blister tape and stop at the first sign of a hot spot, because a ten-minute fix at the first warning prevents a trip-ending blister. A little preparation turns a good fit into a comfortable trail day.
Fit mistakes that only show up on the trail
Some fit problems hide in the store and appear on the second or third hour of a hike. Feet swell, especially in heat and on long descents, so a boot that felt perfect at the shop can feel tight after five miles. Socks compress and get damp, which changes how the heel sits. A boot that was comfortable with a light pack may press on the top of the foot when you add 30 pounds. For this reason, shop late in the day, walk with weight and take your time.
Pay attention to the first signals. A tingling in the toes means pressure that may become numbness, and a burning spot on the heel is the start of a blister. Stop, loosen the laces, adjust your socks and check the boot for a seam or wrinkle that presses. Many hikers carry a few strips of athletic tape and a small foam patch to cover the spot before it grows. If the problem returns, note where it hits and what you were doing, which helps you or a store fitter find the fix. A trip is a long test, and the best way to learn how a boot fits is to listen to your feet.
Working with a professional fitter
A good boot fitter can save weeks of trial and error. They measure both feet, look at your arch and your gait, ask about your hikes and bring several models in your size and half sizes. They may use a ramp, a heel-lift test and a pressure check. Share your history of blisters, injuries and any orthotics, and describe the terrain and pack weight you expect. A fitter can also stretch leather, add padding, adjust lacing and suggest insoles.
If you buy online, look for retailers that offer free returns and fit guidance. Order two sizes if you are unsure, and test them indoors on a clean carpet. Bring your own socks and any insoles, and compare notes with the retailer's size chart. The aim is the same: a boot that supports your foot, holds the heel, gives the toes room and works with your socks and the trails you walk.
Common mistakes to avoid
- Buying boots in the morning when feet are smallest.
- Trying boots on with thin dress socks.
- Choosing a size by street shoe size.
- Ignoring heel lift because the boot feels fine standing.
- Skipping the ramp test.
- Assuming that pain will go away with break-in.
- Over-tightening laces to fix a poor fit.
Frequently asked questions
How much room should I have in front of my toes?
About a thumb's width, around half an inch, between your longest toe and the end of the boot when you stand. This keeps your toes off the front on a descent. Too much room causes sliding, and too little causes black toenails.
Should hiking boots be tight?
They should be snug but not tight. The heel should be held firmly, the midfoot should feel secure and the toes should have room to move. Tightness that causes pain or numbness is a sign that the boot is wrong.
How do I stop heel slip?
Use a heel-lock lacing technique, try thicker socks or a volume-reducing insole, and check that the boot's heel cup matches your foot. If the heel still lifts more than a quarter inch, a different size or model fits better.
Do I need a half size bigger than my normal size?
Often, yes. Feet swell on the trail, and hiking socks are thicker. Many hikers go up a half to a full size. Always test the fit with hiking socks and on a slope.
Can I stretch boots that are too tight?
Leather boots can stretch a little with wear or professional stretching. Synthetic and waterproof boots barely stretch. A boot that is too small in length cannot be fixed. Buy the right size from the start.
How long does it take to break in a hiking boot?
Leather boots may take 20 to 50 miles of walking, and lightweight synthetic boots a few short hikes. Start with short outings and increase the distance as the boots soften and your feet adapt.
Sources & further reading
Image credits
- "Hiking shoes Lowa" by DocteurCosmos, CC BY-SA 3.0, via Wikimedia Commons.
- "Jack Wolfskin, OutDoor 2018, Friedrichshafen (1X7A0425)" by Matti Blume, CC BY-SA 4.0, via Wikimedia Commons.


Ready to buy?
Compare the gear: Clothing & Footwear
5 Best Hiking Boots Under 50 in 2026
Best hiking boots under $50: five mid-top and ankle boots compared on waterproof membranes, outsole grip, weight and insoles for casual trails.
5 Best Hiking Boots Under 75 in 2026
Best hiking boots under $75: five men's and women's mid-top boots compared on suede and leather uppers, midsoles, waterproofing and weight.
5 Best Hiking Shoes Under 75 in 2026
Best hiking shoes under $75: five low-top waterproof and breathable shoes compared on uppers, waterproofing, traction and fit for day hikes.
6 Best Hiking Shoes Under 50 in 2026
Best hiking shoes under $50: six low-top hiking shoes from waterproof leather to a barefoot-style trail shoe, compared on traction, cushioning and fit.
6 Best Hiking Boots For Men Under 100 in 2026
Men's hiking boots under $100 compared on waterproofing, ankle support and grip, from Columbia leather to budget mesh boots for casual trails.
5 Best Hiking Boots For Men Waterproof in 2026
Five men's waterproof hiking boots compared on membrane type, sealed construction, insulation and traction for wet trails, slush and mud.
4 Best Hiking Boots For Plantar Fasciitis in 2026
Hiking boots with orthotic arch support, cushioned midsoles and wide toe boxes for trail walkers who deal with heel and sole pain.
6 Best Hiking Boots For Wide Feet in 2026
Hiking boots for wide feet, from true wide toe box designs to W-size listings and Columbia leather boots, with fit caveats for every pick.
Keep reading