
Practical Camping Guide · 12 min read
How to Break In Hiking Boots
A four-week break-in schedule for hiking boots, with sock, lacing and hot spot fixes, plus when to stop and return boots that do not fit.

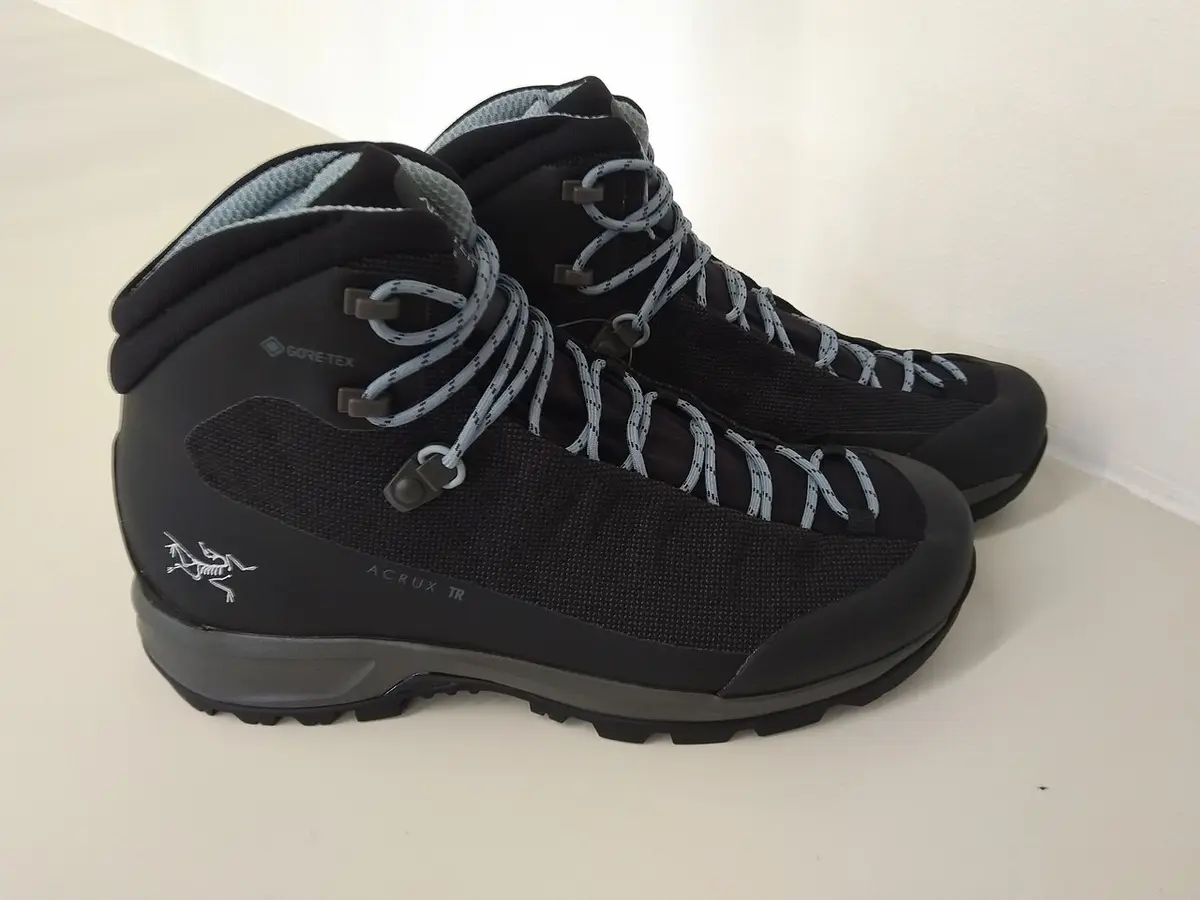
Break in hiking boots by wearing them for short periods at home first, then on short walks that grow longer over two to four weeks, wearing the socks you will hike in, lacing them correctly and loading a pack gradually. Light synthetic boots may need only a few miles, while stiff full-grain leather backpacking boots can need 30 to 50 miles. Never take brand-new boots on a long trip, and stop at the first hot spot instead of pushing through it.
Break-in is the process by which the stiff materials of a new boot soften and mold to your foot, and your foot adjusts to the boot. It is not a way to fix a boot that does not fit. If a boot hurts in the store, it will not become comfortable with walking, and the first step in a good break-in is making sure the boot is right; see how hiking boots should fit. This guide covers a break-in schedule, the right socks and lacing, how to find and treat hot spots, techniques for stubborn leather, what to avoid and when to give up and return the boot.
What actually happens during break-in
New boots have several stiff parts. The leather or synthetic upper must stretch and crease at the flex points, the footbed compresses to the shape of your foot, the midsole softens slightly as the foam warms and compresses, and the sole's rocker finds its natural bend. The boot also learns where your foot flexes, which reduces rubbing. Meanwhile your skin adapts to new pressure points, and callus and toughness build in places that rub.
Leather takes the longest, because full-grain leather is thick and dense. Split-grain leather and synthetic uppers break in faster. Waterproof liners add stiffness. Lightweight hiking shoes and trail runners barely need any break-in. The type of boot determines the timeline, and the schedule below adapts to each.
Before you start: check fit and gear
Before you break in a boot, confirm that it fits: a thumb's width in front of the toes, little heel lift, no pressure points and room for the foot to flex. Get the right socks, usually medium-weight merino or synthetic hiking socks, and wear the same ones during the break-in. Consider aftermarket insoles if you need them, and add them before you start. Trim your toenails short. Clean and condition leather boots lightly if the maker recommends it.
A boot that will not fit is better returned than broken in. Many retailers accept returns on boots that have been worn indoors but not outdoors, so check the policy before you wear them outside.
A four-week break-in schedule
| Week | Activity | Duration | Notes |
|---|---|---|---|
| 1 | Wear at home, around the house or office | 1 to 2 hours a day | Lace properly, watch for pressure |
| 2 | Short walks on pavement and trails | 1 to 3 miles | Add slopes and stairs |
| 3 | Hikes on varied terrain with a light pack | 3 to 6 miles | Increase the pack to 10 pounds |
| 4 | Longer hikes with trip-like pack weight | 6 to 10 miles | Test the downhill and the descent |
Light synthetic boots can compress this to one or two weeks, and stiff leather boots may need extra time. The key is progression: increase the distance and weight gradually, and take them out on terrain like the trail you plan to hike. A boot that feels fine on a flat street may rub on a steep descent.
Socks, lacing and insoles
The right socks are an essential part of break-in. Avoid cotton, which holds moisture and causes blisters. Choose merino or synthetic socks of the weight you will use on the trip. A thin liner sock under a thicker sock can reduce friction for people who blister easily.
Lacing changes where the boot presses. Start with the laces snug but not tight. If your heel slips, use a heel-lock lacing with a surgeon's knot at the ankle. If the top of your foot hurts, skip an eyelet or loosen the lace over the pressure point. If your toes hit the front on descents, tighten the lacing across the instep to hold your foot back, and consider a slightly larger boot. Lace the lower part and upper part of the boot separately for different tightness, and re-lace when your feet swell.
Insoles affect the fit and comfort. Many stock insoles are thin foam, and a supportive insole can improve arch support and reduce pressure. Replace the insole before you begin the break-in, since changing later alters the fit.
Finding and fixing hot spots
A hot spot is a warm, red, sensitive patch that precedes a blister. Stop when you feel it. Apply moleskin, a blister pad or athletic tape over the area, or a bit of lubricant such as an anti-chafe balm, before it becomes a blister. Check your socks for wrinkles, and re-lace the boot to remove slack or relieve pressure. If a hot spot repeats in the same place on multiple walks, the problem is the fit or the lacing, and not just break-in. Common patterns:
- Back of the heel: heel slip. Try a heel lock, thicker socks or a smaller size.
- Toes: the boot is too short, or your foot slides on descents. Tighten the lacing across the instep or size up.
- Top of the foot or ankle: the tongue or the collar presses. Adjust the lacing or move the tongue.
- Ball of the foot or outer edge: the boot is too narrow. Try a wider size.
- Arch: insole is wrong. Try a different insole.
Keep a small blister kit in your pack: moleskin, tape, a small pair of scissors, antiseptic wipes and a few bandages.
Special techniques for stubborn boots
Some leather boots respond to extra help.
- Wearing them around the house with the thickest socks. Wear them for an evening to stretch gradually.
- Using a boot stretcher or a professional stretch at a shoe repair shop for localized pressure points. Shops can stretch leather at the toe box or ball.
- Conditioning the leather with the recommended wax or conditioner to soften it, following the maker's instructions. Do not overdo it, since too much can reduce support and waterproofing.
- Walking in them in water is a myth with risk. Soaking boots and drying them with your feet inside can damage leather and glue, and it is not recommended by most makers.
Avoid heat methods like hair dryers, ovens and sun on a dashboard, which can crack leather and weaken adhesives. Avoid "sleeping in" boots or soaking them. A slow, steady break-in is more effective and safer.
Break-in for different types
Lightweight hiking boots and shoes. Often comfortable out of the box, with 1 to 2 weeks of short hikes. See hiking boots vs hiking shoes vs trail runners for the differences.
Full-grain leather backpacking boots. Need 3 to 4 weeks or 30 to 50 miles with progressively heavier loads.
Waterproof boots. The membrane adds stiffness, and the break-in is similar to that of the upper material. Check that the lining does not wrinkle. For the trade-offs, read waterproof vs non-waterproof hiking footwear.
Women's boots with ankle support. Look at the structure around the ankle, which may press at first. The best lightweight hiking boots for women with ankle support list includes models designed to flex around the ankle.
Budget boots. Inexpensive boots can be stiff and sometimes use harder materials, so break-in may be longer and less reliable; see the best hiking boots under $50 and under $75.
Cold-weather boots. Insulated boots are bulky and need extra time with winter socks.
Break-in for wet, cold and heavy-load trips
If your trip involves wet terrain, you will want to break in the boots in similar conditions, because wet leather and wet socks behave differently from dry ones. A few outings on damp grass or after a rain let you check for new rubbing points once the boot is damp, and they show whether the waterproofing works. The best waterproof hiking boots for Alaska list covers boots designed for wet, rugged terrain, and these usually have a longer and firmer break-in than a light day boot. After wet outings, dry the boots slowly at room temperature, as described in how to dry wet hiking boots, because repeated heat damages glue and leather.
For heavy loads, finish the break-in with a pack close to the weight you will carry. Weight changes how your foot spreads and how the heel and toes behave, and problems often appear only when the pack is on. If you plan to carry 35 pounds on a backpacking trip, do at least two training hikes with 25 to 35 pounds before you leave. Cold-weather boots also need break-in with winter socks and the insulation you will use. The men's options in the best hiking boots for men under $100 and the best hiking boots for men waterproof lists can help you compare models in these categories before you commit to a break-in schedule.
Why blisters form, and how break-in prevents them
A blister forms when friction, heat and moisture combine at one spot. Repeated shear between the skin and the sock or boot separates layers of skin, which fill with fluid. The more your foot slides inside the boot, the more shear it experiences, so heel slip and toe sliding are the main culprits. Wet skin has a higher coefficient of friction and tears more easily, which is why sweat and damp socks make things worse. Heat softens skin and speeds the process.
Break-in tackles the causes in three ways. It teaches you how to lace the boot so the foot stays put, it softens stiff spots in the boot that concentrate pressure and it toughens the skin gradually, building mild callus in the places that rub. Good socks and a lubricant reduce friction directly, and keeping the foot dry through breaks slows the cycle. If you notice a hot spot, you can often stop the process within minutes by covering the area, which is far cheaper than treating a torn blister three miles from the trailhead.
A sample break-in log
Imagine a hiker breaking in a pair of leather backpacking boots over three weeks. On day one she wears the boots at home for two hours and notices pressure at the outside of the left little toe. She mentions it to the store, which stretches the toe box slightly. On day four she walks two miles on pavement and feels a faint hot spot on the right heel, so she adds a heel-lock to her lacing. On day nine she hikes five miles on a trail with a 12 pound pack and feels no problems on the climb, but her toes bump the front on the descent, so she tightens the instep lacing and trims her toenails. On day fourteen she carries 25 pounds for eight miles with no new hot spots. On day twenty she does a loaded overnight trip and the boots feel like old friends.
Notice that each problem was caught early and fixed with a small change, and that none of them required heroic effort or pain. The log also shows that the pack weight was introduced in stages, which lets the boot and the foot adapt. If any step had produced a persistent problem, she would have gone back to the store. This kind of steady, observant approach works for almost any boot.
Leather versus synthetic uppers
The material of the upper changes how the break-in feels. Full-grain leather is thick, durable and molds to your foot over time, which means the boot becomes personalized but takes longer to soften. It needs conditioning to stay supple, and it dries slowly. Split-grain leather combined with nylon mesh is lighter and breaks in faster but molds less. Fully synthetic uppers are light and mostly comfortable from the start, with little change over time, and they are less likely to stretch to fix a fit problem. Nubuck and suede are leather variations that feel softer and need care against dirt.
For a boot you plan to keep for years, leather offers repairability and a personalized fit. For a boot you want to wear next week, synthetic is simpler. For either, remember that stretch is limited, and the right size and shape matter more than the material.
Track what you learn
Keep a simple log during break-in. After each outing, note the distance, the socks, the lacing method, any hot spots and where. Patterns show up fast: if the same heel spot hurts in three outings, you know to adjust. If a particular lacing works, repeat it. If the boot feels good after week two but starts rubbing with a pack, you know load is the issue. A log takes a minute and makes decisions easier, including the decision to return the boots.
Take photos of your feet after a long outing, because redness and rubbing marks reveal pressure points that are easy to forget the next day. Share them with a store fitter, who can often suggest a different size, a lacing change or a better insole.
After the break-in: caring for the boots
Once the boots are comfortable, protect them. Clean mud off after each trip, since dirt abrades leather and stitching. Treat leather with the maker's recommended conditioner a few times a year, and re-treat the water repellent on fabric and suede panels when water stops beading. Replace insoles as they flatten, and re-check fit with each new pair of socks. Rotate pairs if you hike often. Store boots in a cool, dry place with the laces loosened and the tongue pulled out, and avoid a hot car, which can warp materials and loosen glue. A broken-in boot is a good investment, and a few minutes of care after each trip keeps it that way.
When to stop and return the boots
Break-in discomfort should fade with each outing. If after two or three weeks you still have pain, numbness, repeating blisters in the same spot, toes hitting the front or a heel that lifts more than a quarter inch, the boot is wrong for your foot. Return it while you still can, and try a different size, width or model. Keep the receipt, and wear them only indoors and on clean surfaces until you decide.
A good boot becomes comfortable quickly and does not need heroic effort. If you find yourself dreading the break-in, the boot is the problem. Spending a little more time at the store, with a ramp and the right socks, saves weeks of trouble.
Common mistakes to avoid
- Wearing brand-new boots on a long trip.
- Skipping the right socks during break-in.
- Ignoring hot spots and hoping they will go away.
- Using heat, soaking or sleeping in boots to speed things up.
- Believing that a boot that hurts will get better.
- Changing insoles midway through break-in.
- Over-tightening laces to fix slip.
Frequently asked questions
How long does it take to break in hiking boots?
Lightweight boots need a few miles over a week or two. Stiff leather backpacking boots may need 30 to 50 miles over three to four weeks. The more rugged the boot, the longer it takes.
Can I speed up the break-in process?
A little. Wear the boots around the house with thick socks, use a boot stretcher at a shop for pressure points and increase the walking gradually. Avoid soaking them, heat and skipping steps.
Should I wear thick socks to break in boots?
Wear the socks you will actually hike in. Break-in with a different sock can mislead you about fit. For stretching a tight spot, an evening in thicker socks at home can help.
What if my heel slips?
Try a heel-lock lacing, a slightly thicker sock or an insole that reduces volume. If the heel still lifts more than a quarter inch, the boot may be the wrong size or shape.
Do waterproof boots take longer to break in?
Sometimes, because the membrane and liner add stiffness. The break-in schedule is similar, but check that the interior lining is smooth and that the tongue does not press.
When should I return boots instead of breaking them in?
If you have pain, numbness, repeating blisters in the same spot or toes that hit the front after two or three weeks of reasonable break-in. These are fit problems that will not fix themselves.
Sources & further reading
Image credits
- "Arcteryx Acrux Trail women trekking boots" by Jjanhone, CC BY-SA 4.0, via Wikimedia Commons.

Ready to buy?
Compare the gear: Clothing & Footwear
6 Best Lightweight Hiking Boots For Women With Ankle Support in 2026
Best lightweight women's hiking boots with ankle support: high-cut Foxelli, mid-cut ANJOUFEMME and NORTIV 8 boots compared for weight and stability.
6 Best Waterproof Hiking Boots For Alaska in 2026
Best waterproof hiking boots for Alaska: six men's and women's boots compared on seam-sealed waterproofing, winter tread, ankle height and toe protection.
5 Best Hiking Boots Under 50 in 2026
Best hiking boots under $50: five mid-top and ankle boots compared on waterproof membranes, outsole grip, weight and insoles for casual trails.
5 Best Hiking Boots Under 75 in 2026
Best hiking boots under $75: five men's and women's mid-top boots compared on suede and leather uppers, midsoles, waterproofing and weight.
6 Best Hiking Boots For Men Under 100 in 2026
Men's hiking boots under $100 compared on waterproofing, ankle support and grip, from Columbia leather to budget mesh boots for casual trails.
5 Best Hiking Boots For Men Waterproof in 2026
Five men's waterproof hiking boots compared on membrane type, sealed construction, insulation and traction for wet trails, slush and mud.
4 Best Hiking Boots For Plantar Fasciitis in 2026
Hiking boots with orthotic arch support, cushioned midsoles and wide toe boxes for trail walkers who deal with heel and sole pain.
6 Best Hiking Boots For Wide Feet in 2026
Hiking boots for wide feet, from true wide toe box designs to W-size listings and Columbia leather boots, with fit caveats for every pick.
Keep reading