
Practical Camping Guide · 13 min read
How to Layer Clothing for Camping and Hiking
Build a camping layering system with a wicking base, an insulating mid-layer and a shell, plus how to adjust on the move and keep hands and feet warm.

Layer for camping with three basic layers: a moisture-wicking base layer next to the skin, an insulating mid-layer (fleece, wool, down or synthetic puffy) over it and a weatherproof outer shell for wind and rain. Add and remove layers to stay just below the point of sweating, because sweat is what makes you cold when you stop. Avoid cotton, start a little cool and carry one more insulating layer than you think you need for camp.
Layering works because several thin layers trap air between them and let you adjust to changing effort and weather. One heavy coat cannot do that. The goal is to regulate moisture and temperature, which means thinking about what you do, not just the thermometer. This guide covers the function of each layer, the materials, how to adjust on the move, sample systems for different conditions, how to handle hands, head and feet, and the common mistakes that turn a cold night into a miserable one.
The principle: manage moisture first, then warmth
Cold and wet go together. Water in your clothing pulls heat from your body about 25 times faster than air does. Sweat is the largest source of moisture on most trips, so the first rule of layering is to avoid sweating heavily. The second rule is to move whatever sweat you produce away from your skin. The third rule is to keep insulation dry. Everything else follows from these.
That is why experienced campers take layers off before they start to climb and put them on when they stop, instead of waiting until they are hot or cold. A small adjustment, such as opening a zipper, removing a hat or taking off a jacket for ten minutes, costs nothing and prevents a lot of trouble later. A good mantra is "be bold, start cold." If you are comfortable at the trailhead, you will be too hot ten minutes later.
Base layer: next to the skin
The base layer wicks sweat and adds light insulation. Choose merino, synthetic or a blend, and avoid cotton. The fit should be close but not tight, which helps wicking. Weight depends on conditions: lightweight for mild weather and high exertion, midweight for cold weather, heavyweight for very cold or inactive use. For a detailed comparison of materials, see merino vs synthetic base layers.
Include bottoms in cold weather, and keep a dry base layer in your pack or tent for sleeping. Changing into a dry layer at camp is one of the best comfort upgrades available, since wet clothing chills you as soon as you stop.
Mid-layer: insulation
The mid-layer traps warm air. Common choices are fleece, wool sweaters, synthetic insulated jackets and down jackets. Fleece is breathable, dries quickly and tolerates sweat, which makes it good for active use. Down jackets provide the most warmth for their weight and pack small, but need to stay dry; see down jacket fill power vs fill weight for how to read the numbers. Synthetic insulated jackets keep warm when damp and are more affordable.
For many trips you need two mid-layers: a light fleece or grid-fleece for activity and a warmer puffy jacket for camp. The puffy goes on at rest stops and in the evening, over everything else. Shop lists for the best fleece jacket under $100, the best puffer jacket for men under $100 and the best down jacket for men backpacking cover these.
Outer layer: shell
The shell protects from wind and rain. A waterproof, breathable jacket with a hood is the standard. A wind shirt, a very light layer, works for dry, windy days. For hard rain, a full rain jacket and pants complete the system; see rain jacket waterproof and breathability ratings explained for how to evaluate shells. In cold, snowy conditions, an insulated winter jacket serves as both mid-layer and shell, as in the best winter jackets under $100 list.
The shell should fit over your mid-layers without restricting movement, and have a hood that works with a hat. Vents let you dump heat without removing the jacket. Wind accounts for much of the chill on a cold day, so a windproof outer layer makes the difference between comfortable and miserable.
Sample systems
| Conditions | Base | Mid | Shell | Extras |
|---|---|---|---|---|
| Warm, dry (70 to 85 F) | Light T-shirt | Light fleece for evening | Wind shirt or rain jacket in pack | Sun hat |
| Mild, changeable (50 to 65 F) | Light long-sleeve | Fleece | Rain jacket | Light gloves, hat |
| Cool, damp (35 to 50 F) | Midweight top and bottom | Fleece plus light puffy | Hardshell jacket and pants | Warm hat, gloves |
| Cold (15 to 35 F) | Midweight top and bottom | Fleece and insulated jacket | Insulated or hardshell | Insulated gloves, balaclava |
| Very cold (below 15 F) | Midweight or heavy | Heavy fleece and thick puffy | Hardshell | Mittens, face protection |
Use the table as a starting point and adjust to your own warmth. People vary widely: a person who runs warm may skip a layer, and a cold sleeper may add one. Camp temperatures drop at night, so plan for the lowest temperature, not the afternoon high.
Adjusting on the move
Layering works only if you actually adjust. Develop habits.
- Start cool. Dress for the temperature you expect after ten minutes of walking, not for the trailhead.
- Vent early. Open zippers and remove hats and gloves before you sweat.
- Shed layers on climbs, and put them back on at the top before you cool down.
- Add a puffy at every break, even short ones, so you do not cool down.
- Keep spare layers accessible at the top of your pack, not buried.
- Change into dry clothes at camp, especially socks and the base layer.
- Eat and drink regularly, because your body needs fuel to produce heat.
Do not wait until you are shivering to add a layer. It is much easier to stay warm than to warm up.
Head, hands and feet
Extremities lose heat quickly and have little muscle to generate it. A hat is the fastest way to adjust: a thin beanie for cool days, a warm hat for cold, a sun hat for hot weather. A buff or neck gaiter protects the neck and face. For hands, thin liner gloves work in cool weather, insulated gloves or mittens in the cold, with a waterproof shell mitt in wet. Mittens are warmer than gloves.
For feet, socks and footwear are crucial. Wool or synthetic socks, never cotton, and boots with room for socks without being tight. See how hiking boots should fit for the fitting basics, hiking boots vs hiking shoes vs trail runners for choosing the type of footwear, and waterproof vs non-waterproof hiking footwear for the wet-weather decision. Bring spare socks and change them when they get damp.
Kids, camp and sleeping
Children lose heat faster than adults and cannot always tell you they are cold, so layer them thoughtfully and check often. A fleece jacket for kids, as in the best fleece jackets for kids list, is an easy mid-layer that tolerates dirt and washing. Pack extra base layers and socks, since accidents and puddles happen.
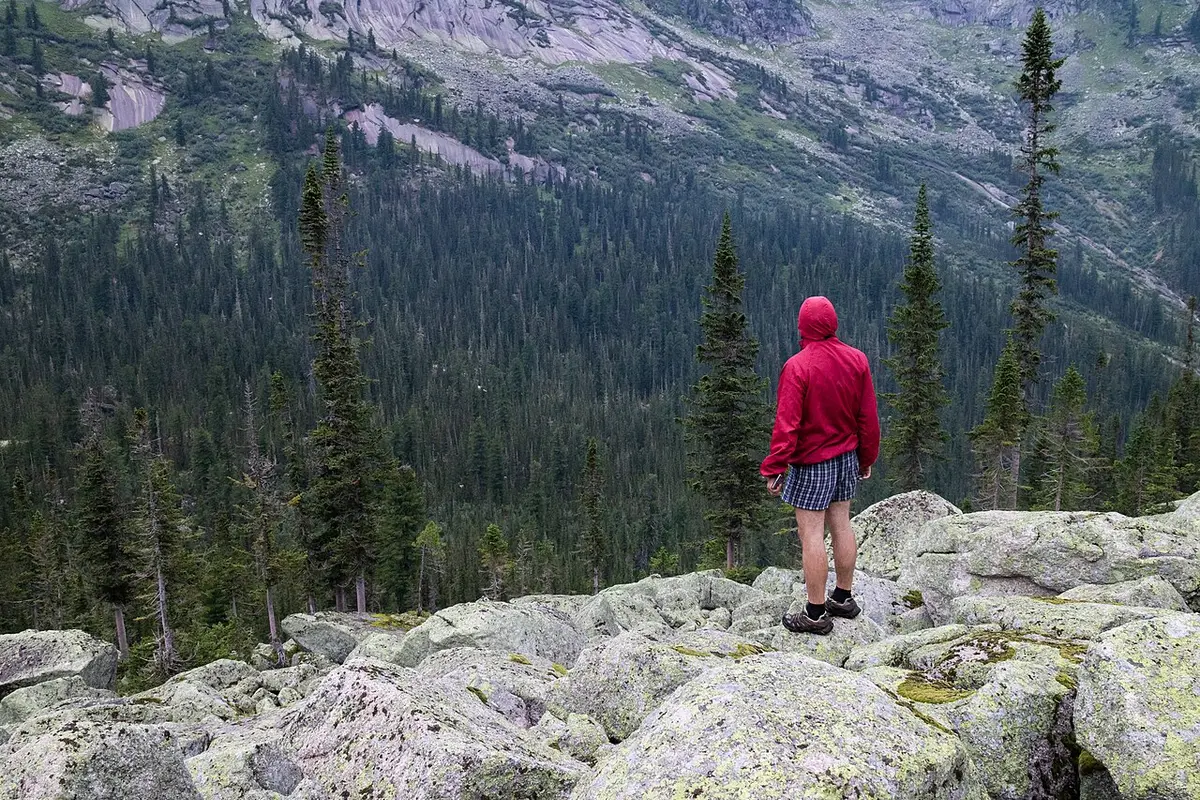
At camp, put on your puffy as soon as you stop. A warm hat and insulated pants add comfort in the evening. For sleeping, wear a dry base layer and a hat, and avoid wearing so many layers that you compress your sleeping bag's insulation. Keep tomorrow's clothes in the foot of the bag so they are warm in the morning.
Layering for specific camp situations
Cold nights around the fire. After a day of hiking, your body cools quickly once you stop. Put on your puffy and a warm hat before you feel cold, and sit on an insulated pad, not bare ground. Insulated pants or a sleeping bag worn like a skirt add warmth to the legs. Keep sparks away from down and synthetic fabrics, which melt or burn, and use a thin outer shell over the puffy if embers fly.
Early-morning starts. The coldest hour is just before sunrise, when you leave a warm bag and face the day. Keep your clothes inside the bag's foot box so they are warm, dress in the bag as much as possible and stage your layers in the order you will put them on. Start with a layer more than you think you need, since the first mile warms you up quickly, and shed layers at the first stop.
Wet, windy days. Wind strips heat from clothing, and wet cloth conducts heat away quickly. A waterproof, windproof shell with a hood is the most important layer. Keep insulation dry under it, and swap damp clothing for dry as soon as you stop. If you feel cold even in your layers, add insulation underneath and eat. A small stove and a hot drink do wonders, and a trail snack provides the fuel your body needs to produce heat.
Shoulder-season swings. In spring and fall, temperatures can range by 40 degrees in a day. Wear a light base layer, carry a fleece, a puffy and a shell, and be willing to put on and take off layers many times. A packable wind shirt and a light hat are small, adaptable pieces that earn their weight. The skill is not in the clothing but in the habit of adjusting.
Fit, sizing and compatibility between layers
Layers must work together. A snug base layer, a mid-layer with enough room to fit over it and a shell with room for both is the right order. If the mid-layer is too tight, it compresses the base and restricts blood flow, and if the shell is too tight, it squeezes the insulation and reduces warmth. Try layers on together and move around: reach overhead, bend, squat and cross your arms. Check that sleeves do not ride up and that the hem covers your waist when you move.
Compatibility includes closures and pockets. Zippers and hoods should not interfere with a pack's hip belt and sternum strap, and pockets should be reachable. Check that a hood fits over a helmet or a hat, if you plan to use one. When you buy new layers, bring the existing ones to the store, or try them at home with the others. A system that works as a whole is worth more than a pile of excellent but incompatible pieces.
Budget approach to a layering system
You do not need to buy everything at once or spend a lot. Start with the pieces that give the greatest benefit: a synthetic or wool base layer, a fleece jacket and a basic rain jacket. Add a puffy jacket next, because it makes camp comfortable. Then fill in hats, gloves and socks, and later rain pants and a better shell. Thrift stores, outlets and end-of-season sales are good sources for fleece and wool. Avoid cotton hoodies and jeans for the outdoors.
Spend where it matters: shell fit and hood, warm hat and gloves and good socks. Save on pieces that are less sensitive to quality, such as a basic fleece. If you camp in cold weather, the extra investment in a warm puffy pays back every trip. Care extends life, so wash technical layers properly and store them dry.
Women's and kids' considerations
Layering principles are universal, but fit and warmth differ by body. Many women run colder than men at the same activity level, particularly in the hands, feet and core, so a woman may need a warmer insulating layer and extra attention to extremities. Women's garments often have a different cut, with shorter torsos and room for hips, and a good fit helps layers trap warmth and wick moisture. If a men's or unisex cut fits better, wear it, and judge by comfort and movement, not the label.
Children need a simple system, as they are active in bursts and chill quickly when still. Dress them in a snug wicking base, a fleece mid-layer and a waterproof shell, with a hat and gloves. Check them frequently with a hand on their neck or back, since cold hands are not always a sign of cold core. Kids sweat when they run, then freeze when they stop, so remove a layer before hard play and add one at rest. Avoid cotton hoodies, which stay wet. Pack a spare dry set, including socks, because accidents and puddles happen. A child who is warm and dry is a child who wants to keep going.
Layering for sleeping and for waiting around
The system for sleeping is different from the system for moving. Heat generation drops when you lie still, so you need more insulation than you needed on the trail, with less bulk to avoid compressing your sleeping bag. Wear a dry base layer and dry socks, and a hat. Put on a thin insulating layer if the night is very cold, and keep your puffy jacket handy to drape over the bag. Do not wear damp clothes to bed. Hang or stuff damp items under your bag's footbox, or in a spare dry bag, so they dry from body heat without wetting your bag.
For waiting around, such as at a viewpoint, a bus stop or a campground evening, treat your body as if it were at rest. Put on your warmest layers early, a hat and gloves, and sit on an insulated pad rather than cold ground. A hot drink in a thermos and a snack make a big difference. In a pinch, a foam sit pad, a space blanket under your jacket and a wool blanket draped over the legs give comfort with little weight. Knowing how to adjust between active and passive modes is a core skill in comfortable camping.
Fabric choices at a glance
Choosing fabrics is easier with a short table of what each does best.
| Fabric | Strengths | Weaknesses | Where it shines |
|---|---|---|---|
| Merino wool | Warm when damp, resists odor | Slower to dry, less durable | Base layers and socks for multi-day trips |
| Synthetic (polyester, nylon) | Dries fast, durable | Holds odor | Hard exertion, hot weather |
| Fleece | Breathable, warm, tolerant of sweat | Bulky, not windproof | Active mid-layer |
| Down | Warmest for weight, compressible | Loses warmth when wet, costs more | Dry cold, camp puffy |
| Synthetic insulation | Warm when damp, cheaper | Heavier, bulkier | Wet cold, active insulation |
| Softshell | Stretchy, wind-resistant, breathable | Not fully waterproof | Cool, dry, active days |
| Waterproof shell | Blocks rain and wind | Less breathable | Storms, wet snow |
| Cotton | Comfortable, cheap | Holds water, dries slowly | Dry, warm days only |
Notice that no single fabric does everything, which is why layering uses several. Pick fabrics for each layer's role: wicking at the skin, insulation in the middle and protection outside. If you can only buy a few items, prioritize a synthetic or merino base, a fleece and a shell, and add a puffy when budget allows. Over time, you will build a set that fits the climates you camp in. Check labels for fiber content, and learn how each piece behaves when wet. A quick wash and a wet test at home shows how fast something dries.
Mistakes in layering
- Wearing cotton next to the skin.
- Overdressing at the start and sweating.
- Burying the warm layer at the bottom of the pack.
- Tightening layers so they compress and cool.
- Forgetting the head, hands and feet.
- Skipping the dry set for camp.
- Wearing one heavy layer instead of several light ones.
- Not eating enough to fuel warmth.
Common mistakes to avoid
- Waiting until you are cold to add a layer.
- Using a waterproof shell as the only layer in cold weather.
- Compressing a down jacket in a pack for days when it is damp.
- Choosing mid-layers that are too tight to fit over the base.
- Ignoring wind, which can matter more than the thermometer.
- Wearing wet clothes into the sleeping bag.
- Skipping a hat.
Frequently asked questions
How many layers do I need for camping?
Three is the core: base, insulation and shell. In cold weather, add a second insulating layer and extremity gear. In warm weather, one light layer and a rain jacket may be enough. Adjust to the temperature and the activity.
Why is cotton bad for layering?
Cotton absorbs and holds moisture, dries slowly and loses insulation when wet, which makes you cold. It is fine for dry, warm days, but wool or synthetic fabrics are safer for any trip where weather can change.
Should I wear my puffy jacket while hiking?
Usually not, because it traps heat and moisture and you will overheat. Wear it at rests and in camp. Keep it at the top of your pack for easy access.
What is the best mid-layer?
It depends on your activity. Fleece is best for active use, down for the warmest and lightest rest-stop and camp layer and synthetic insulation for damp conditions. Many people carry a fleece and a puffy.
How do I stay warm sleeping?
Wear a dry base layer and a hat, use a properly rated bag and a warm pad and eat a snack before bed. Do not wear too many layers inside the bag, which compresses insulation.
How do I layer for rain?
Wear a wicking base layer, a thin mid-layer if cold and a waterproof shell with vents. Add rain pants and a hat with a brim. Venting reduces sweat inside the shell.
Sources & further reading
Image credits
- "Base layer (331495665)" by Mack Male from Edmonton, AB, Canada, CC BY-SA 2.0, via Wikimedia Commons.
- "Ergaki, Hiker in the wild, Taigish Valley, Sayan Mountains, Russia" by Vyacheslav Argenberg, CC BY 4.0, via Wikimedia Commons.


Ready to buy?
Compare the gear: Clothing & Footwear
6 Best Down Jacket For Men Backpacking in 2026
Best men's down jackets for backpacking: Rab, Outdoor Research, Columbia and Eddie Bauer down jackets compared for fill power, packability and weather.
5 Best Down Jackets For Mountaineering in 2026
Best down jackets for mountaineering: 800-fill Rab and Pioneer Camp alpine jackets plus lighter options, compared for warmth, shell and hood fit.
6 Best Fleece Jacket Under 100 in 2026
Best fleece jackets under $100: classic zip fleeces, a sherpa and two fleece-lined softshells compared for warmth, layering and weather protection.
5 Best Fleece Jackets For Kids in 2026
Best fleece jackets for kids: polar fleece and fleece-lined jackets for boys and girls, compared for warmth, wind protection and easy care.
6 Best Puffer Jacket Men S Under 100 in 2026
Best men's puffer jackets under $100: packable, water-resistant puffers from about $17 to $42, compared for warmth, hoods and pockets.
5 Best Winter Jackets Under 100 in 2026
Best winter jackets under $100: ski shells, packable puffers and fleeces compared for warmth, weather protection and what a budget really buys.
4 Best Fleece Jacket Men With Hood in 2026
Men's hooded fleece jackets compared: a TACVASEN winter parka, a waterproof fleece-lined shell, a tactical hoodie and a heavyweight zip hoodie.
5 Best Fleece Jacket Women With Hood in 2026
Women's hooded fleece jackets: Outdoor Ventures softshell and polar fleece, a long MoFiz layer and sherpa hoodies compared for warmth and fit.
Keep reading